The first bookcase I ever built had shelves that slid around every time you put a book on them. I had nailed the shelves into dadoes I cut with a circular saw and chisel, and neither the width nor the depth was consistent enough to matter. The shelves fit, sort of, but the case felt like it was held together by luck. That was 1998. I have cut a few hundred dadoes and rabbets since then, and I can tell you this: a router does the job better than any other tool in a home shop, and a cordless router like the DeWalt DCW600B makes it easier to move around a case without fighting a cord. This guide walks you through every step, from picking the right bit to making a test cut that saves your project before you commit to expensive material.
A dado is a channel cut across the grain of a board, typically used to house a shelf, a drawer bottom, or a panel. A rabbet is a step cut along the edge or end of a board, used to set back a panel, fit a back into a case, or create a lapped joint. Both joints are straightforward with a router. Both can go sideways fast if you skip the setup steps. Do not skip the setup steps.
Your dadoes are only as good as the router holding the bit steady
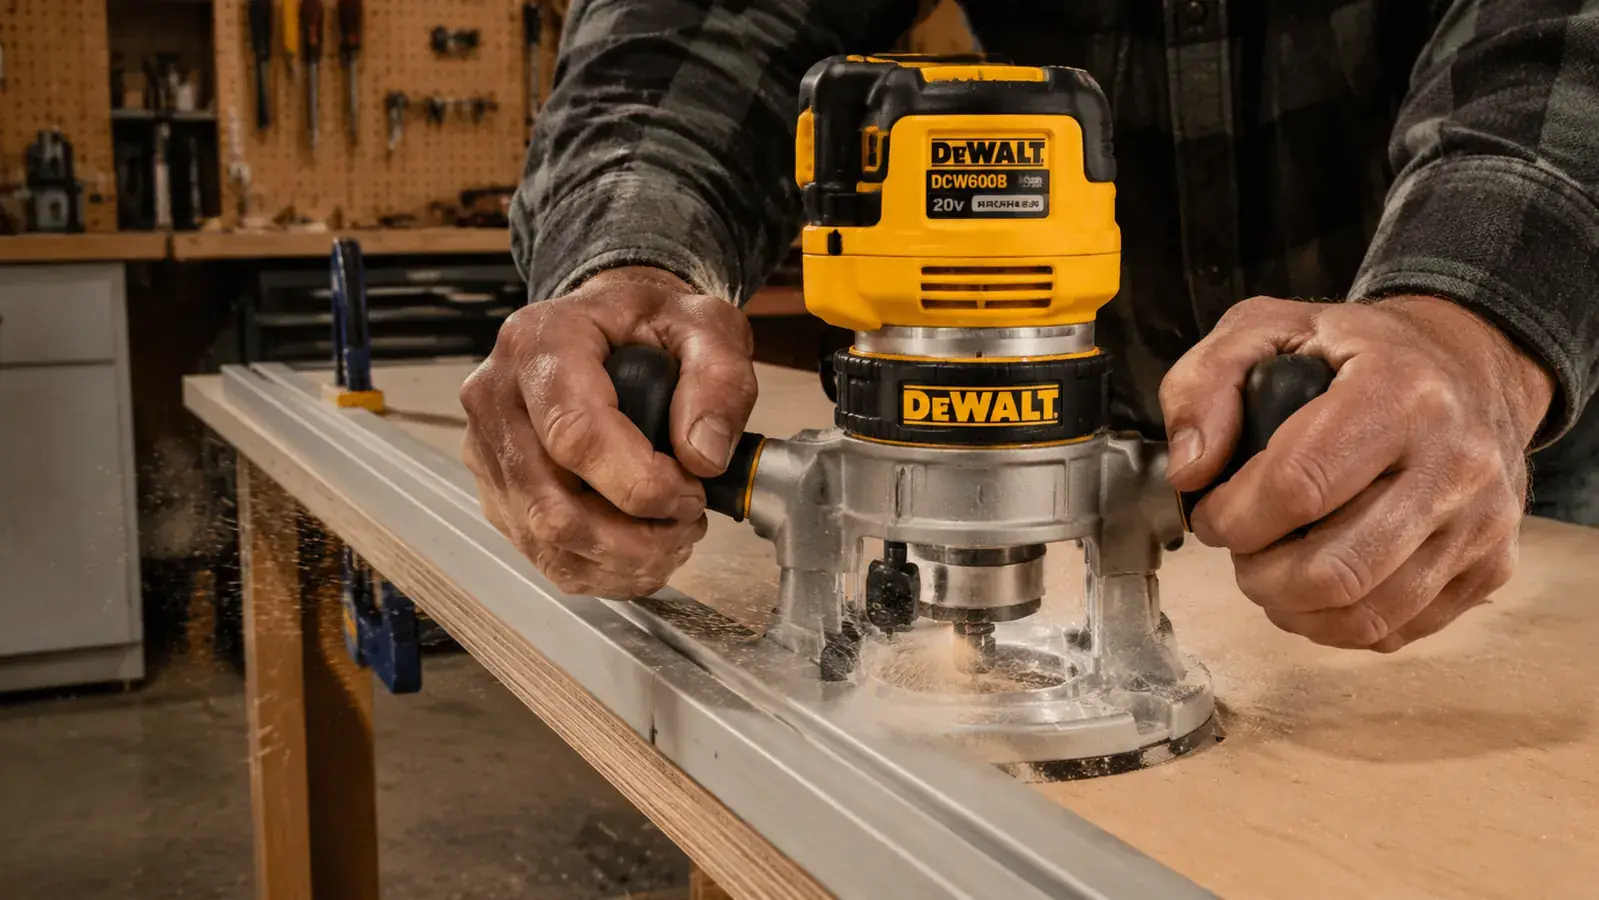
The DeWalt DCW600B runs a brushless motor, adjustable speed from 16,000 to 25,000 RPM, and accepts both 1/4-inch and 1/2-inch shank bits. No cord to trip over when you reposition for a cross-grain pass. Check the current price on Amazon before your next project.
Amazon Check Today's Price on Amazon →Bit Selection: Straight vs. Spiral, 1/4 Shank vs. 1/2 Shank
Step 1: Match Your Bit to the Job
For dadoes and rabbets in hardwood or hardwood plywood, reach for an upcut spiral bit in 1/2-inch shank if your router accepts it. The spiral geometry pulls chips up and out of the cut, which keeps the channel cleaner and reduces heat buildup at the cutting edges. A 3/4-inch diameter upcut spiral will cut a standard dado for 3/4-inch plywood shelving in a single pass, assuming you are not going too deep in one shot.
For softwood pine, MDF, or quick shop projects, a straight two-flute bit works fine and costs less. A 1/4-inch shank straight bit is adequate, but if your collet accepts 1/2-inch shanks, use them. The larger shank transfers less vibration to the bit, runs truer, and reduces deflection when you are pushing through dense grain. The DeWalt DCW600B accepts both, so you have the choice.
For rabbeting the edge of a board, a rabbeting bit with a pilot bearing is the cleanest solution. You set the depth, ride the bearing against the edge, and the bit handles the rest. Rabbeting bit sets typically come with interchangeable bearings that let you cut different rabbet widths from the same bit body. That is a good investment for a home shop doing cabinet and casework.

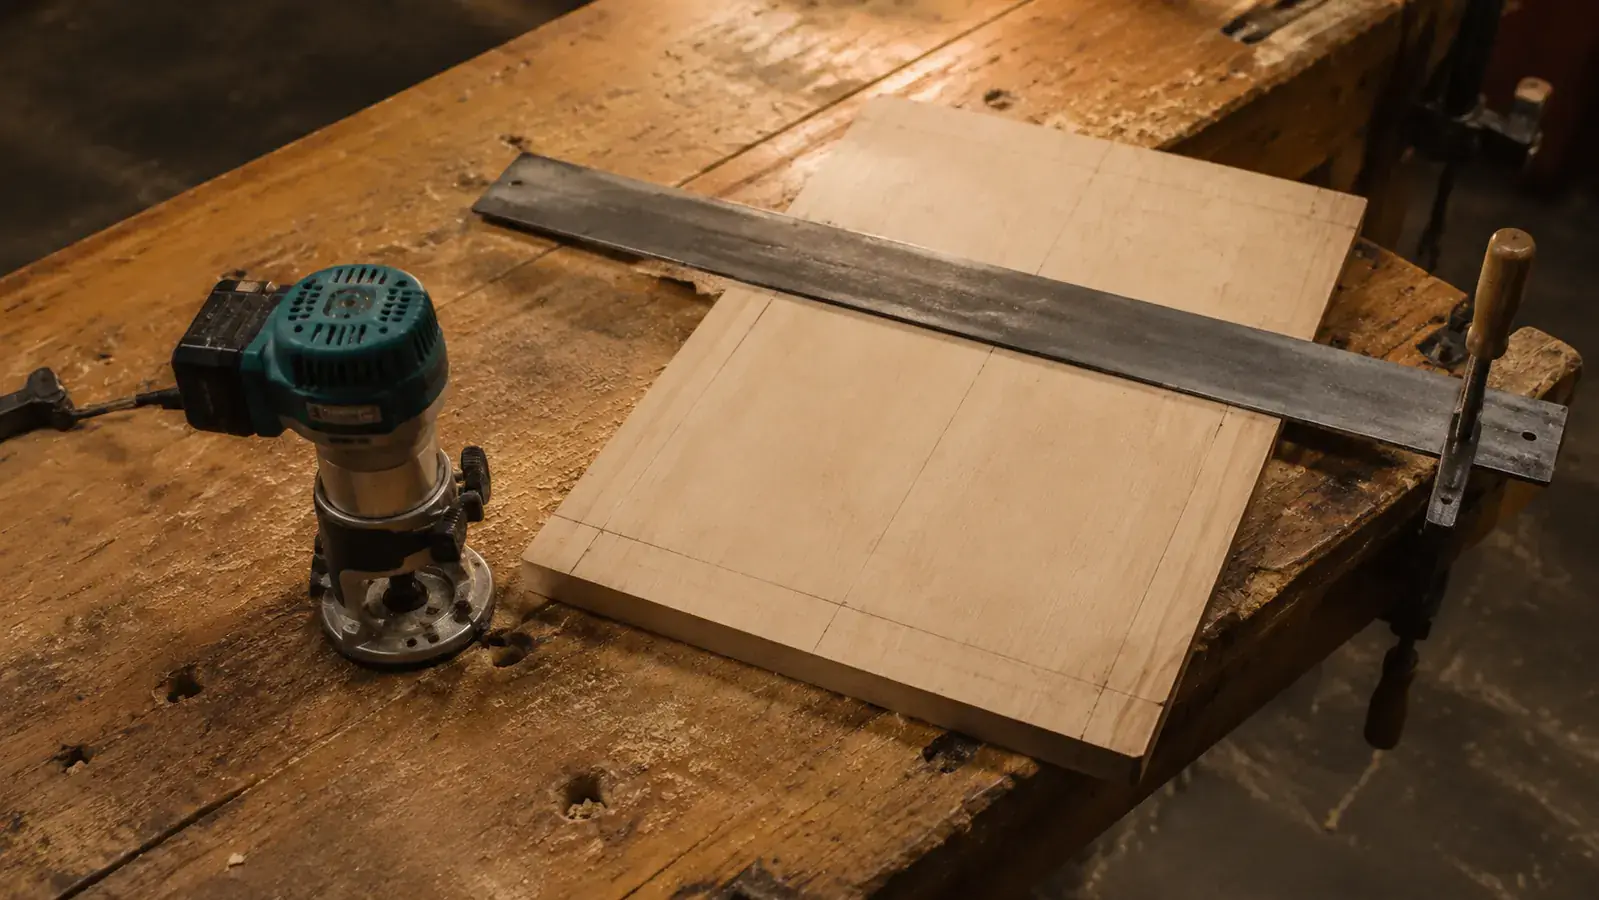
Setting Up Your Fence: Edge Guide vs. Straightedge
Step 2: Decide Between a Router Edge Guide and a Clamped Straightedge
An edge guide mounts directly to the router baseplate and rides against the edge of the workpiece. It is fast to set up and works well for rabbets along a long edge or for dadoes that are close to the edge of the board. The limitation is that it can only reference from the edge of the board, so if your dado is in the middle of a wide panel, the edge guide arm may not reach far enough to be useful.
A clamped straightedge fence is more versatile. Clamp a piece of MDF, a good aluminum level, or a manufactured guide rail across the workpiece, set its position so the router baseplate rides against it and the bit lands exactly where the dado needs to be, and you are ready. Measure from the cut to the baseplate edge on the fence side, not from the center of the bit. This is the offset measurement, and you calculate it once for each bit diameter you use. Write it on a piece of tape stuck to the baseplate.
When clamping the straightedge, place clamps on both ends and at least one in the middle if the fence is longer than 24 inches. Check it does not bow. One bowed fence ruins the dado and the project. Use at least two clamps per side.
Setting Depth and Running a Multi-Pass Strategy
Step 3: Set Your Depth in Passes, Not All at Once
A dado depth of 3/8 inch is typical for 3/4-inch stock. That leaves enough meat in the wall of the board to keep it from blowing out under load. Do not route that 3/8 inch in a single pass. The motor on a cordless router works harder when cutting deep, the bit heats up faster, and the risk of tearout rises significantly.
Use three passes instead. Set the first pass to 1/8 inch deep, the second to 1/4 inch, and the third to your final depth of 3/8 inch. Each pass clears chip space for the next, keeps the bit cooler, and produces a flatter dado floor. The DeWalt DCW600B has a depth-adjustment ring with clear graduations, so dialing in each pass takes about fifteen seconds. Do not eyeball the depth setting. Use the scale.
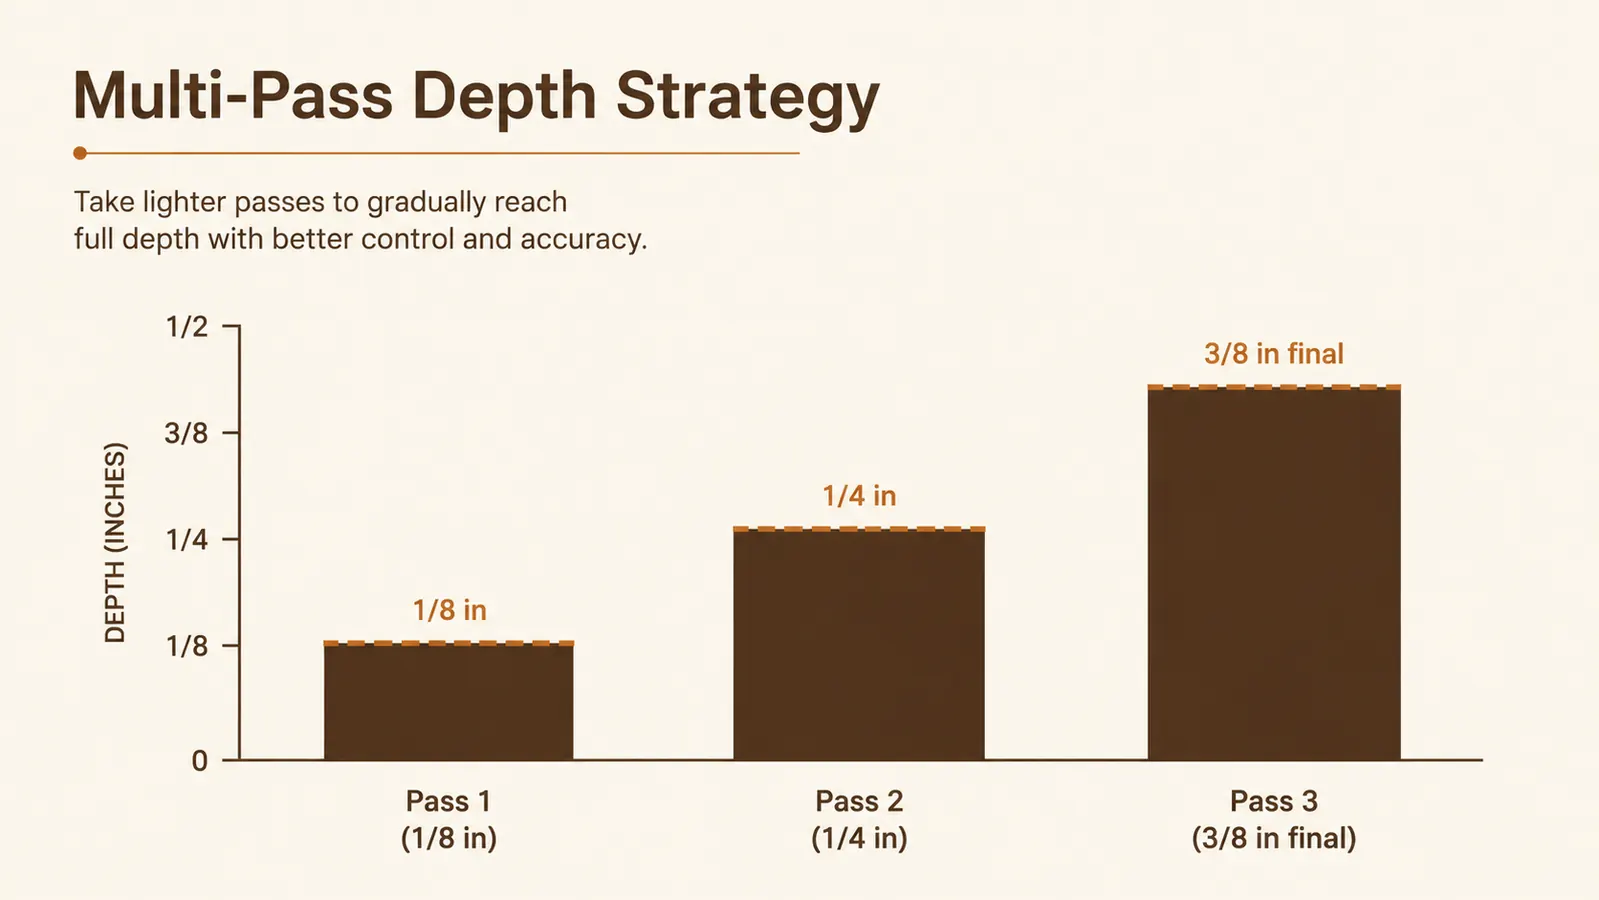
Between passes, clear chips from the channel with a brush or a quick blast of air. Chips packed into the bottom of the dado will push the bit off depth on the next pass, giving you an uneven floor. Flat floors matter for drawers and shelves. Take the extra thirty seconds.
Climb Cutting: What It Is and When to Use It
Step 4: Understand Climb Cuts Before You Try One
A standard router pass moves the router from right to left when the bit rotates counterclockwise (viewed from above). This is the conventional cut direction. The bit's rotation pushes the router against the fence, which is safe and controllable.
A climb cut moves the router in the opposite direction, from left to right. The bit rotation now pulls the router forward rather than pushing it back. In the wrong circumstances, this causes the router to grab and lurch across the workpiece. Climb cuts are dangerous if you attempt them at full depth or without a firm two-handed grip.
Where a climb cut earns its place: at the very start of a dado to score the exit edge before running the full conventional pass. A shallow climb cut of 1/16 to 1/8 inch along the far side of the dado severs the wood fibers before the conventional pass blows through them. The result is a crisp, tearout-free edge on the exit side. This is especially useful in veneer plywood, oak, and anything with interlocked grain. Keep the climb cut shallow, keep both hands on the router, and move slowly. If you are not comfortable with it, skip it and score the exit line with a sharp marking knife before routing instead.
Score the exit edge of every dado before your main pass and tearout becomes a non-issue. A marking knife works. A shallow climb cut works better.
Cutting Rabbets Along an Edge with a Rabbeting Bit
Step 5: Set the Rabbeting Bit and Run the Edge
Chuck the rabbeting bit with the appropriate bearing for your target rabbet width. Tighten the collet with both wrenches if your router ships with them. A loose bit in a rabbet cut will wander in depth partway through the pass and leave you with a stepped floor.
Set the router on the edge of the workpiece and adjust depth so the bearing contacts the face of the board squarely. Run the router around the perimeter of the piece if you are cutting a back-panel rabbet on a case, moving counterclockwise around the inside of the case or clockwise around the outside. Keep the bearing pressed firmly against the reference face throughout the pass. If the bearing lifts away from the reference surface even briefly, the bit wanders and the rabbet goes off depth.
For long edge rabbets on a single board, clamp the workpiece flat and use the edge guide attachment. Set the guide to the target rabbet width, confirm the depth, and push the router from right to left in a single deliberate pass. Again, use two or three passes if the rabbet is deeper than 3/8 inch. Rabbeting deep in one pass bogs down the motor and bruises the edge of the workpiece.
The Test Cut: Always Do This Before the Real Board
Step 6: Cut Scrap First, Fit the Joint, Then Commit
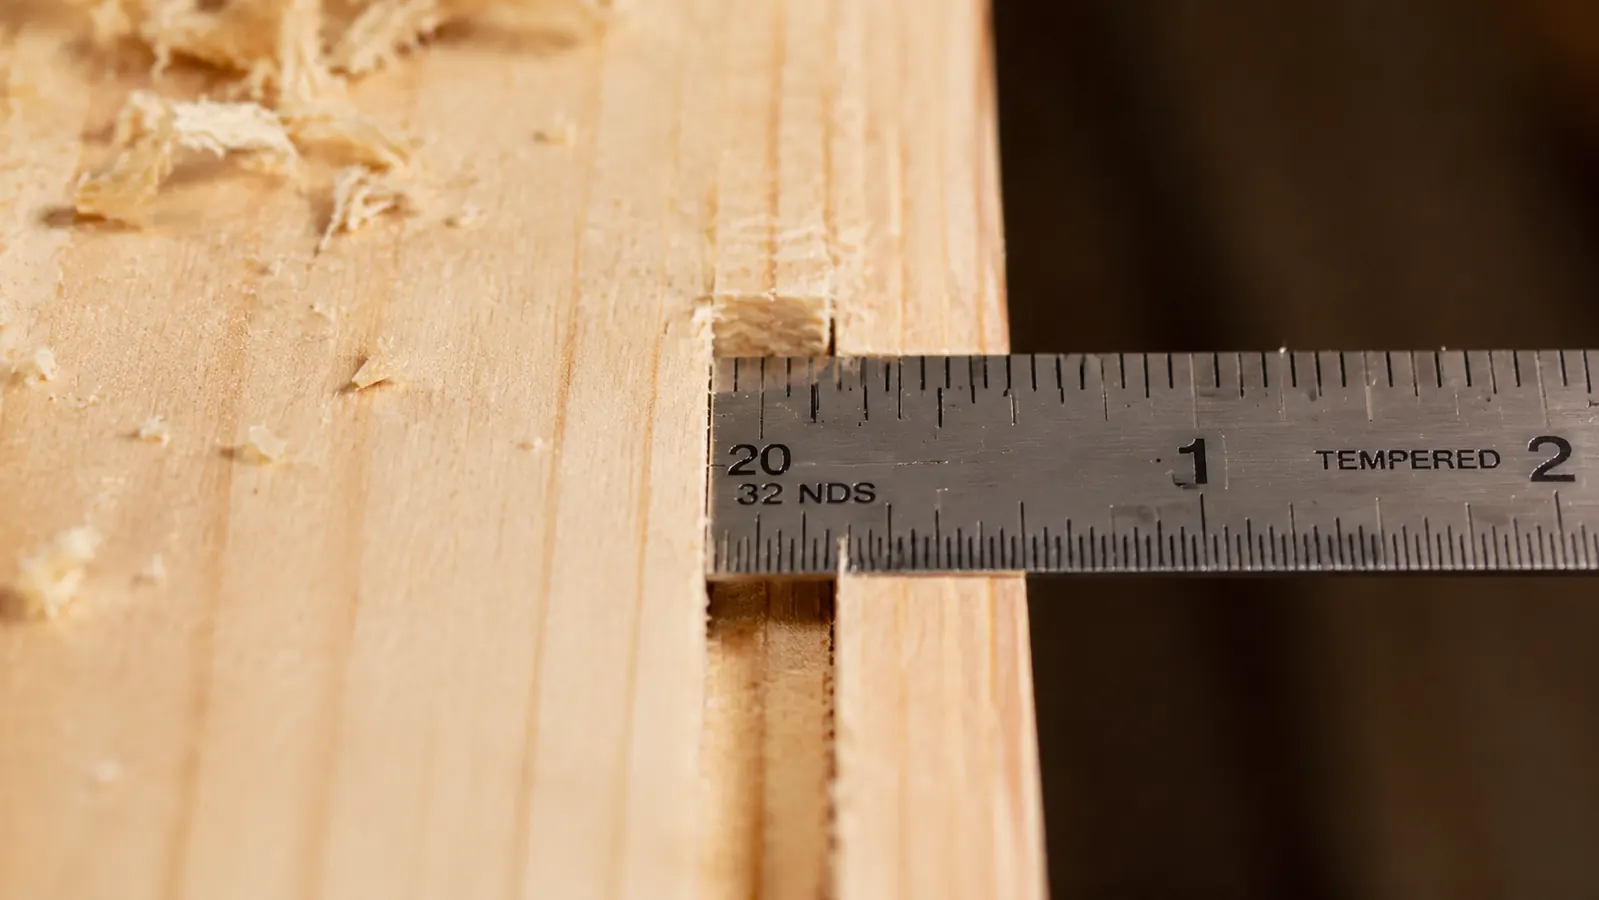
This is the step most home woodworkers skip and most experienced woodworkers never skip. Cut your dado or rabbet in a piece of scrap that is the same species and thickness as your actual workpiece before you touch the real board. Then test the fit.
A dado for a 3/4-inch plywood shelf should accept the shelf snugly without force. If you have to mallet the shelf in, the dado is slightly undersize. Widen it in small increments by moving the fence a hair and taking another pass. If the shelf slides in with side-to-side slop, the dado is too wide. You cannot fix a too-wide dado easily, which is exactly why you test on scrap first.
Keep your test scrap labeled with the bit used, the depth setting, and the number of passes. Tape it to your workbench. The next time you cut dadoes in the same material, you start from a known position instead of guessing. That is the difference between a setup that takes two minutes and one that takes twenty.
What Else Helps
A piece of blue tape along the edges of the dado layout lines reduces tearout in veneer plywood before you even pick up the router. Press it firmly, mark through it, and rout through it. Peel it off after the cut. The fibers at the edge stay connected to the tape instead of lifting away with the bit.
Dial your router speed down from its maximum when running large-diameter bits or making cuts in hardwood. The DCW600B runs from 16,000 to 25,000 RPM and the variable speed dial is easy to reach while routing. For a 3/4-inch straight bit in hard maple, I run around 18,000 to 20,000 RPM. For a small 1/4-inch bit in pine, full speed is fine. Slower speeds with large bits reduce chatter, reduce burning, and give you more control.
Good lighting in your shop matters more than most people think. I run a shop light directly over my bench so I can see the baseplate tracking along the fence and catch any deviation before it becomes a ruined board. If you are squinting to see your layout lines, fix that before you fix anything else.
The router that makes cordless dadoes and rabbets practical
The DeWalt DCW600B pairs a brushless motor with tool-free depth adjustment and variable speed, and it runs on the same 20V MAX batteries already sitting on your charger. Rated 4.8 stars from over 10,000 owners. Check today's price on Amazon and see if a battery bundle gets you a better deal.
Amazon Check Today's Price on Amazon →